
The factor that started our kitchen remodel was seating for our growing family. At Christmas, I was disappointed that not only could we not all eat in the same room but I was limited in what I could actually prepare because I simply did not have the counter space.
When we made the decision to replace all the cabinets, I knew that we would not be able to afford high end cabinets with all the cool features. I am very pleased to say that we have achieved some really cool features and I honestly feel that we are utilizing every each of space in the kitchen currently.
Today, I want to share the special touches that make our kitchen one of a kind. First is the custom tile work.
 This area is behind our stove and I forgot to get a picture after the gout was placed but just look at how cool it looks. Matt and I talked and we really did not want to place full tiles behind the stove. We did go ahead and place the sticky mat until we decided what to do. Zach was watching us work and the idea came to me that he could finish this section of tile using the pieces that we had cut off of other tiles. Zach completed about 3/4 of the area before Lily decided he needed help. The only guidance I gave him was not to place two of the same tile together. This is an awesome custom feature that I am assured will not be repeated anywhere else in the world.
I have already shared about my favorite cabinet. Which is also very custom, here is a reminder picture.
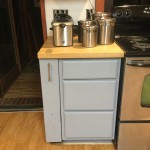
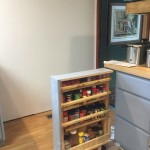
Another feature that is very unique is the electric outlets that are part of the counter top. These were Matt’s suggestion and after a bit of rewiring that we still need to complete, we will be able to plug up and use ALL of my crockpots at that same time as my Kitchen-Aid mixer.


 The final custom cabinet is probably the one that took the most time and effort to figure out. It also ended up costing around $50 to complete. But in reality is saves a ton of space and actually allows me to have all the utensils I need within reach. This cabinet is directly beside the stove and is actually a double sided pegboard.


Currently we still need to do some touch up painting and add quarter round to both the back splash and floor. But we are very close to being at a finishing point with this project.
Here is the progress we have made.